At last we get to sewing everyone’s favorite–the bra! I’m going to jump right into it, because this is going to be a picture-heavy post. Today we’re going to make the straps, put together the cups and sew the frame of the bra. I’ve also included some hopefully helpful tips for sewing with slippery tricot.
Assemble the Straps
Attaching the straps to the bra is the very last step in sewing, and doesn’t need to be done till the end, but I like to assemble them at the beginning. It makes me feel like I have everything ready to go!
First I loop one end of the elastic through the slider, giving me enough stitching room so that I don’t hit the ring as I am sewing.
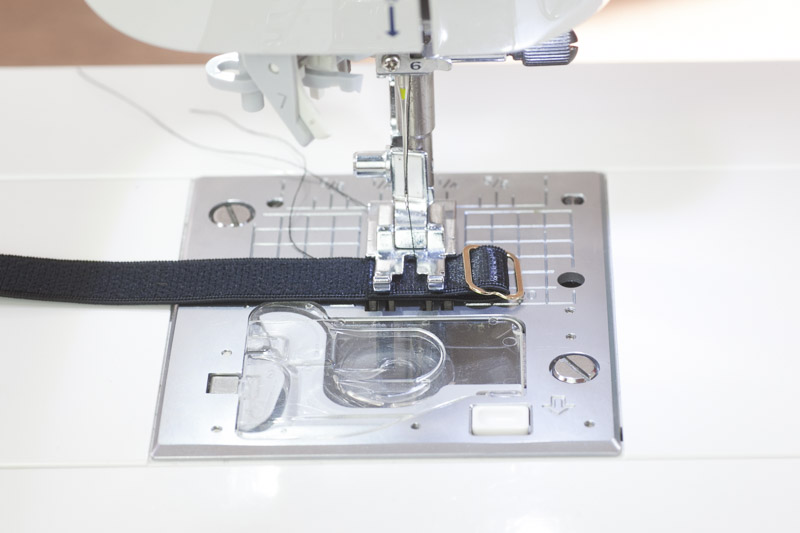
To secure the loop, you can use a bartack stitch or a back and forth straight stitch. Over time I’ve come to prefer the straight stitch because it is easier to sew and gives a neat result that is still secure. I set my stitch somewhere around 1.0 in length and stitch across the elastic.
To reverse the stitch, I turn the elastic around so that I can stitch forward again. Then I sew another line right next to the first line of stitching, and secure by backward stitching a couple of stitches.
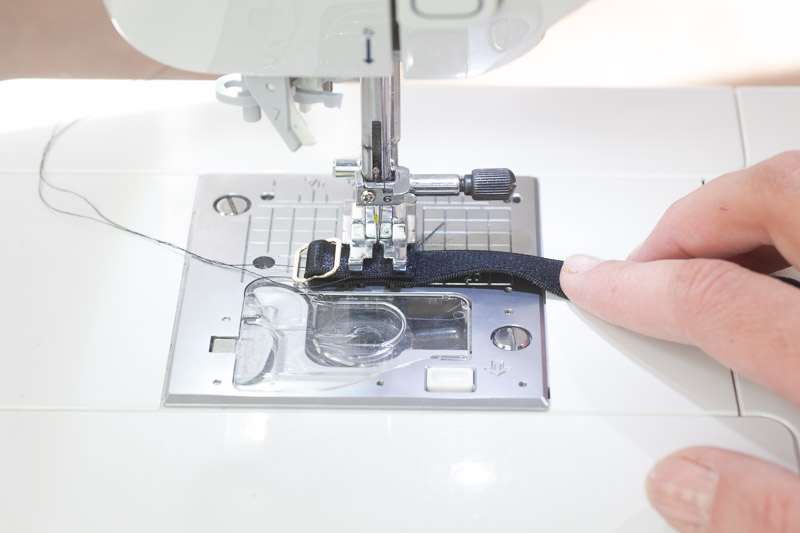
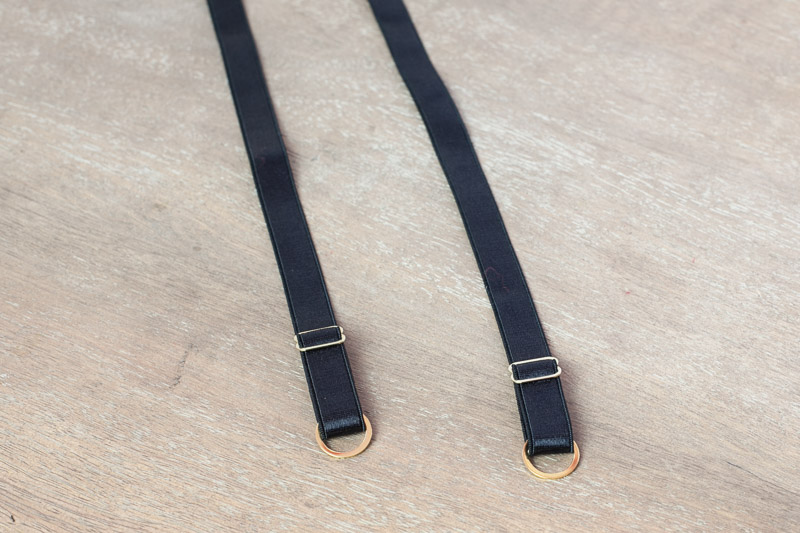
Trim the elastic close to the stitches and finish looping your straps through the rings. If you need some extra step by step photos, see this tutorial.
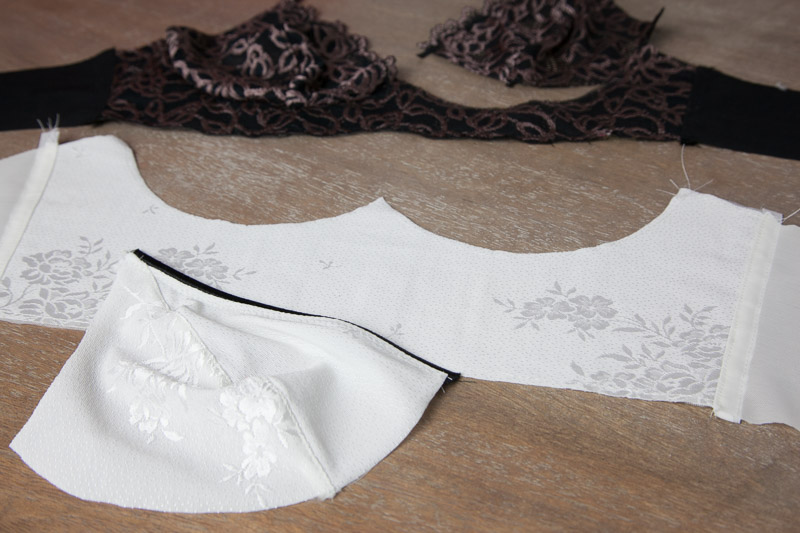
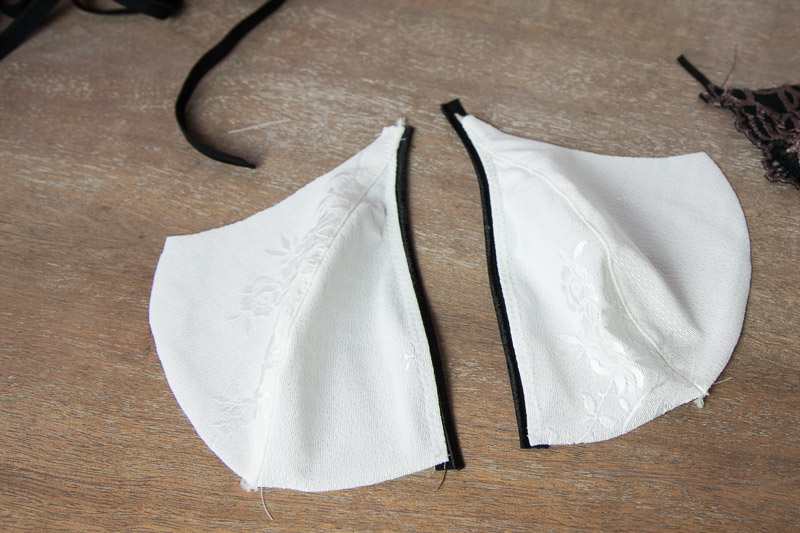
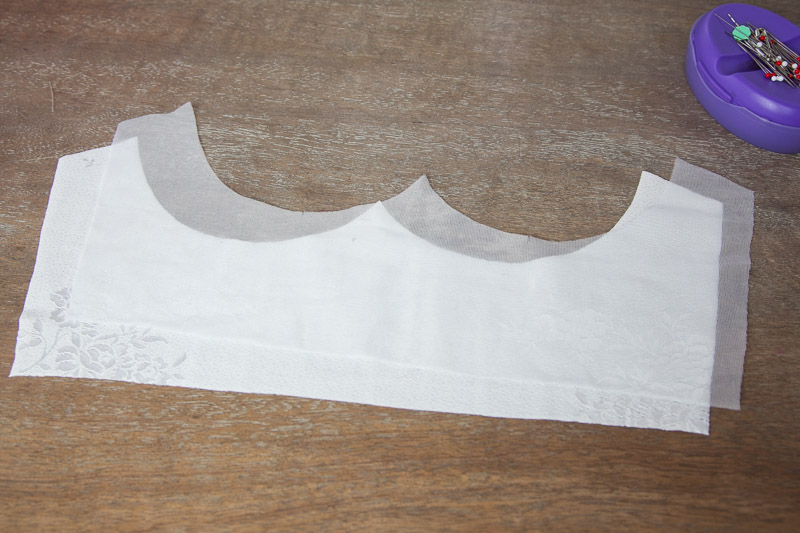
Assemble the Cups
With a regular straight stitch, sew the inner and outer cup pieces together. If you prefer a neater finish you can serge the edges, as I have done.

Then turn the allowances toward the outer cup and topstitch from the right side. Use a longer stitch—I set my stitch length between 3.2 and 3.4.

Topstitching tip: Use your foot as the guide to topstitch 1/16 to 1/8” (2-3mm) away from the edge. On my foot the inside edge of my toe is exactly 1/16” from the needle, so as I am topstitching I make sure the seam is following that edge.
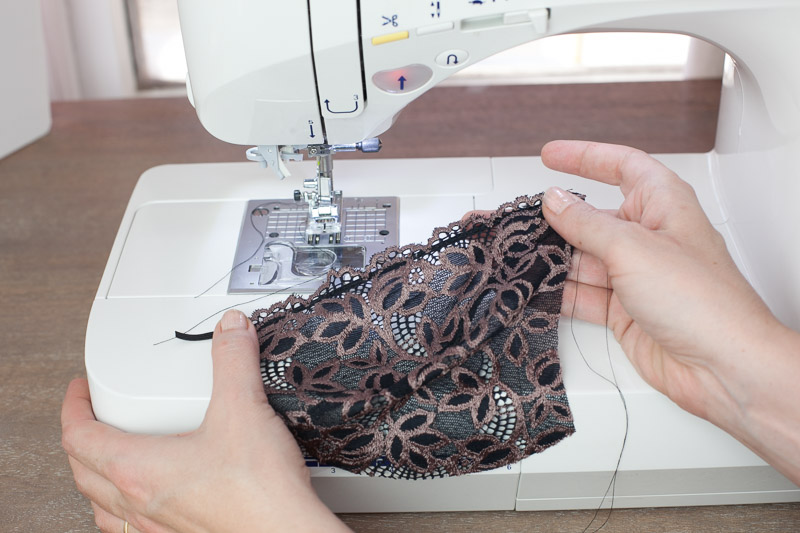
Add Neckline Elastic
Apply your neckline elastic as per the instructions. For my first pass, I used a 2.8 length, 2.0 width zig-zag. For the second pass, I used a 3.0 width and 2.0 length zig-zag.
You’ll notice that I am using a lingerie elastic that has a rounded piping edge to it. This piping sticks out about 1/8″ past the edge of the seamline. I had to remove 1/8″ from my neckline allowance to account for the “piping”; otherwise the cups would create a bulky overlap at the center front because of the extra elastic width. (Oh yes, it’s true–bra-making develops sewing accuracy!)
If you are making the scalloped lace cup variation, you’ll want to stabilize the edge of the lace with a narrow and thin elastic. A 1/8-1/4” clear elastic is ideal for this purpose.
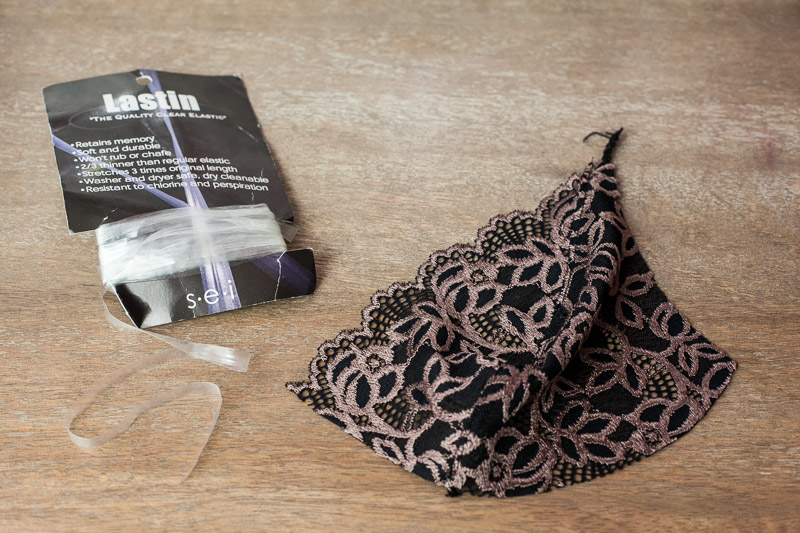
For my bra, I used some thin black neckline elastic that I had left over from an old bra kit, but I apply it in the same way that I use clear elastic. From the wrong side of the bra, line up the elastic so that it is in a straight line just inside the bottom of the scallops. Use a small zig-zag to secure the elastic, and pull very gently as you are sewing.
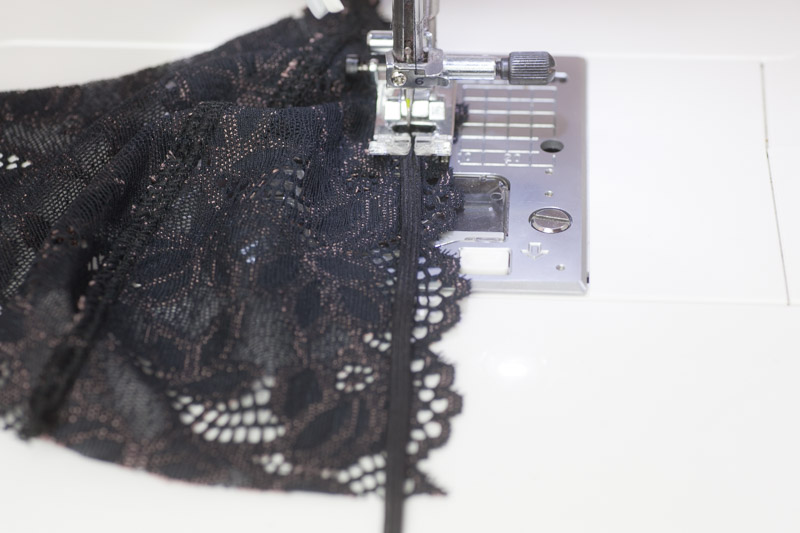
If this is your first time sewing thin or clear elastics to lace, you may want to practice on a scrap to get comfortable with it. You’ll also need to play with your zig-zag width to find one that will fit onto your elastic.
Here you can see what it looks like from the right side. My lace is very open so the elastic is visible:
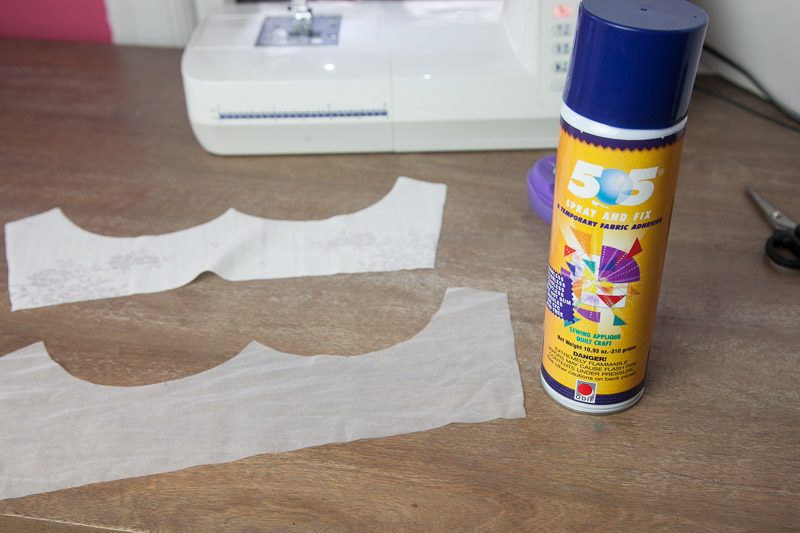
Line the Cradle + Tricot Sewing Tips
Baste your lining piece to the cradle, staying inside the seam allowances. If you decided to use a fusible knit interfacing instead of a lining, then apply your interfacing.
If you are new to sewing with slippery and delicate lingerie fabrics, it might feel tricky basting the lining smoothly to the outer fabric. It gets easier with practice but I wanted to share a few possible tricks to avoiding wrinkles and skewing fabrics.
First, the wrinkles are usually the result of sewing two different fabric types together. Fabrics with 4-way stretch can “grow” as they are being handled or stitched. When stitching a stretchy fabric to one with less stretch or no stretch, the stretchier fabric will want to stretch out further than the other layer.
1. Instead of basting, use temporary spray adhesive to join your two layers for easier sewing. This solution came via Maddie, and it’s genius! Many bra-makers use it to keep delicate layers together in sewing.
2. Before basting, pin your two layers together from the side of the lining. Allow the stretchy outer fabric to relax and spread outside the lining if it wants to. After basting, trim away the excess from the outer fabric.
3. Baste with the lining on top and the stretchy outer fabric on bottom. This allows the feed dogs to ease the stretch fabric into the lining.
4. Loosen the foot pressure if your machine has this option.
5. Use a long basting stitch with a 4-5 stitch length.
6. Stop and raise your presser foot every couple of inches to let the fabric relax. Actually, now that I’m thinking about it, I do this all the time when sewing knits and silks. I think I’ve gotten addicted to the knee lift on my sewing machine.
7. Try a teflon foot or a glider foot, if you have one. Sometimes the foot pressure can really drag on fabrics. Occasionally I sew on a vintage Bernina 830 and it is guilty of dragging on silks and tricots; switching to a teflon foot helps.
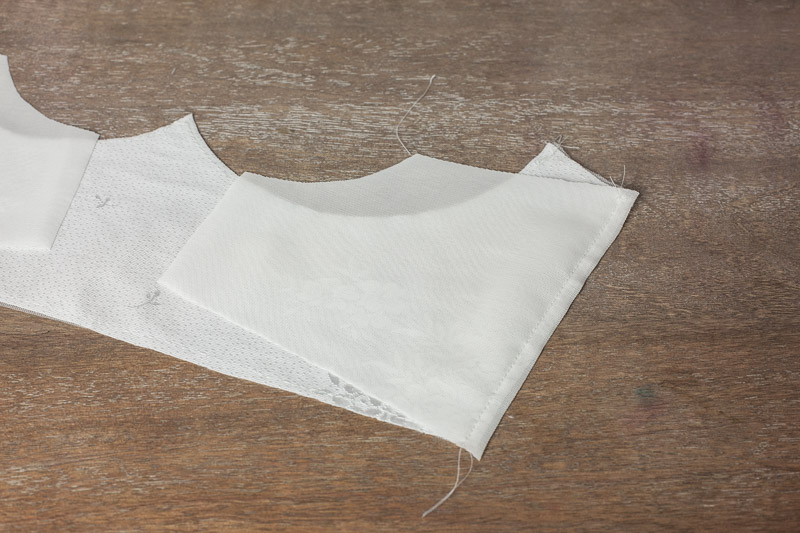
Stitch the Band to the Cradle
Stitch your cradle to the band pieces with a straight stitch.
Fold your seam allowances toward the cradle, and from the right side topstitch them down about 1/8”-3/16” (3-5mm) away from the seam. If you prefer a neater finish to your side seams, you can serge after stitching, then topstitch.
For neat side seams in wired bras, I often hide the seams in the lining but for an easier but pretty approach, I also like stitching a piece of satin ribbon over the seam allowances. I stitch down each side of the ribbon, and this takes the place of the topstitching:
Again, I regret using ivory fabric in photos but you’ll have to believe me–that’s a satin ribbon over the seams!
That was a long post for today but we have a great start on the bra! I’ll be back Monday with the final steps but if you’d like to get a head start, you can sew in the cups to the band and then add your hem elastic.
Have a great weekend!
Would you like tips and inspiration in the craft of lingerie sewing? Sign up for my weekly eletter The Lingerie Maker.
I’m so enjoying this sewalong in anticipation of starting my Watson in the next few weeks. I’m intrigued by the presser foot in the first few pictures, it looks so useful! Can I ask what it’s called and where I might find one? I’m somewhat dissatisfied with my own edgestitching foot and I’m looking for alternatives. Thanks so much for these tutorials 🙂
Hi Kathryn, I use a Juki Exceed and on my machine it’s called a patchwork foot. It’s quite clever in that it marks off 1/8″ and 1/4″ to the edge of the foot. I don’t know if it fits on other machines but this is the foot:
http://www.kenssewingcenter.com/juki-patchwork-presser-foot-p-30127.html
Other machines might call this a straight stitch foot or a 1/4 foot. Bernina, for example, sells both a 1/4 foot and a patchwork foot which help in topstitching/edgestitching. I don’t know what kind of machine you have but if it accepts industrial feet, there are loads of inexpensive edgestitching and “compensating feet” in various widths that are genius for all kinds of topstitching.
Thanks so much for your response – I’m just on a little Bernette at the moment, so I’ll do some Googling for those feet and see what I can find. Your work is incredibly inspiring, can’t wait to see what you do next. Thanks again! 🙂
I sew lingerie quite often but I never thought to turn the straps to only use straight stitch. You are genius ! I use school white sitck of glue (UHU stick) to baste lining and fabric. It is a cheap alternative to 505 spray adhesive. Test with a scrap of fabric before.
Thank you so much for sharing with us. I will start my Watson this we. Bye
I use Sigrid’s tutorial on interfacing lycra when attaching a non-stretch lining to a stretchy fabric. A bit fussy, but gives a very smooth appearance when worn, and I don’t need to worry about the bond of the fusible interfacing breaking down over time. For the Watson bra I move the front band pattern piece about 1/16″-1/8″ past the fold of the fabric, depending on the amount of stretch the lycra has. I then cut the non-stretch lining so the center front is directly on the fold, and pin the two layers together starting from the center front.
http://sigridsewingprojects.blogspot.com/2013/03/interfacing-lycra.html
Hi Anne, yes that is helpful! I’ve learned that in production patterns for RTW, the outer pattern lycra piece is actually cut slightly smaller than the lining (or foam) piece in order to account for that growth. It’s sort of similar in concept to cutting for bend allowance in collars and waistbands. I always let the lycra go relax past the lining and then trim it away. Even with the spray stabilizer it still wants to grow and I let it do that and then trim.
Forgot to add…I like the 1/8″ braided elastic from Fashion Sewing Supply for stabilizing the edge of lace cups. I’ve used clear elastic before but didn’t care for the sticky feeling against my skin. My favorite is the very thin elastic Merckwaerdigh includes in her bra kits. I just sent an email to her asking if she sells would be willing to sell it by the meter.
I bought some of the neckline elastic by the meter from Merckwaerdigh. Not sure if she still sells it but it’s worth a try. I’ll have to try the Fashion Sewing Supply elastic. I like her wider elastic. In my experience a lot of 1/8″ braided elastic is a little too rough but perhaps hers is softer.
How do you feel about using French seams on stretch fabrics? I was thinking it would be pretty to have a finished seam of 1/4″ and stitched down, but would that be too bulky? Is it a strong enough option?
Hi Ally, that’s a great question! I tend to think that French seams are at their best in lightweight wovens. In heavier wovens and knits I prefer other seam types. However, if you really like them by all means give it a try and see what happens!
A few things to think about:
*This pattern’s bra cups are meant to stretch so a French seam might create a “tugging” line down the center of the cup. I think this is the main reason why I avoid French seams in knits—it doesn’t have much “stretchability”.
*It is hard to get French seams to conform well to curves, due to the allowances. For that reason, I usually avoid them in things like bra cups, bustier lines or princess seams, because they create ripples and extra bulk at curves.
Thanks for the reply 🙂 Sometimes you think something, but just want to hear it from someone else so you don’t think you’re crazy 🙂
I totally get that 😉
Hi Amy, I am giving the Watson a try as my first bra sewing experiment! Of course the findings kit I ordered has the wrong size elastic (whoops, got excited and forgot to check) and it is wider than accounted for in the pattern. Would I just add width to those edges equal to the extra width in the elastic? And remove the seam allowance if I want to use fold over elastic on the neckline? Thanks very much!
Hi Maggie,
You’re on the right track! Wider elastic is good at adding more support, so give it a go and see what you think! In my patterns I always mark in the elastic seamline (which on the bottom hem of the Watson is 1/2”). Whenever I need to use a wider or smaller elastic I trace the pattern and draw in the new elastic allowance from the seamline.
Or if using fold-over elastic, I cut off the allowance. You might want to shave off just a wee bit extra from the neckline after cutting off the allowance. Say 3mm (just under 1/8”). Foldover elastic adds bulk to the edge and it’s also easy to sew it at a slight distance from the fabric making it wider than intended. On the Watson that will help make a neater corner where the two cups meet while also not making the strap fold so bulky.
Awesome! Thank you so much! I got excited and tried it anyway with the FOE (removing just the 1/4″), and I did have some trouble with the spot where the two cups join. I’m finding I don’t like FOE as much as I thought I would 🙂 But wow, what a lovely pattern! I’ve been playing a lot with different fabrics and trims which has been a lot of fun.
On that note– is there a place to post pictures of finished Watsons? I don’t have a blog, but I would like to share (esp. since I used alternate trim).
Thanks again!
I know how enticing foe can be… it’s cheap and everywhere! It’s good to have some on hand for when you want to give an edge a binding look but with stretch.U nfortunately it does have its drawbacks, mainly in that it stretches out more quickly than many other elastics.
Instagram is definitely the place where people “group share” their sewing projects! I’m the rare blogger who uses IG very intermittently, but I do check in from time to time. There are loads of Watsons to see… Check out #watsonbra or #watsonbikini and I’m @clothhabit