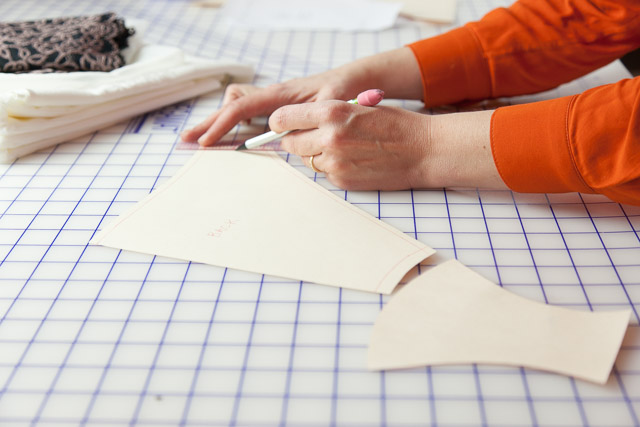
Today we’re going to give the bikini some love. I know that the bra is the star of this pattern but it’s always fun to make a matching set. I never feel complete if I don’t make bottoms to go with my tops!
I like a few different styles of underwear. My go-to is my Ladyshorts pattern but I love bikinis, too. I made about 20 of these to get the fit just so. (I’m obsessed with underwear patterns, what can I say.) However, we all have our preferences. Some of us like a a lot of leg, a lower leg, a higher waist, a very low slung waist. So I am giving you permission to experiment with your pattern, just like I experiment with all of mine. The alterations I’ll be demonstrating are essentially style changes.
Adjusting the Rise
If you are tall or prefer a slightly higher waist, you can simply raise the waistline.
Trace off or print out a new pattern. Before you cut, use a ruler to draw new lines up from your side seams and waist. It’s really as simple as that!
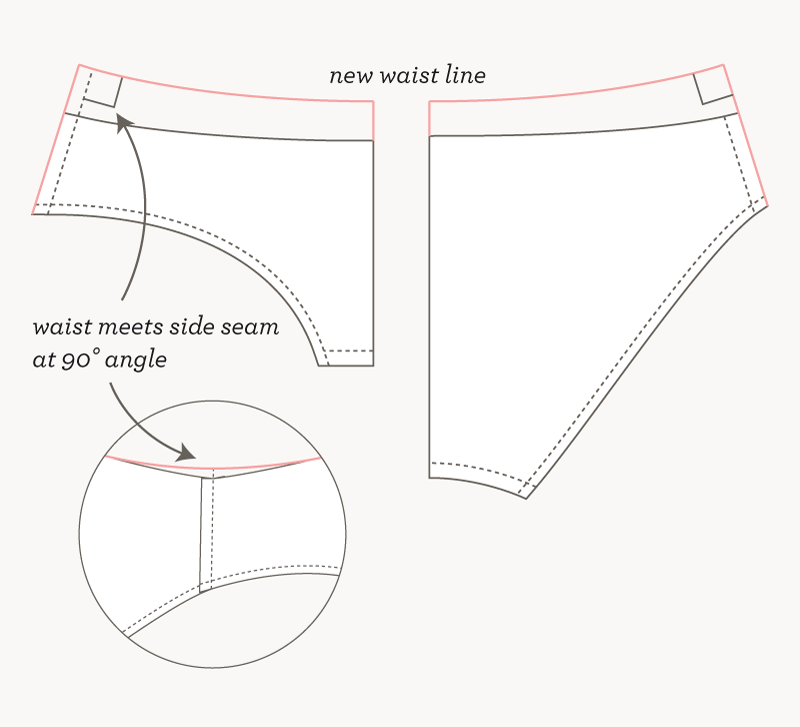
Don’t forget to true your pattern after any alteration. By checking that the waist meets the side seam at a 90° angle help the side seams meet at a smooth curve and not a jagged “V”.
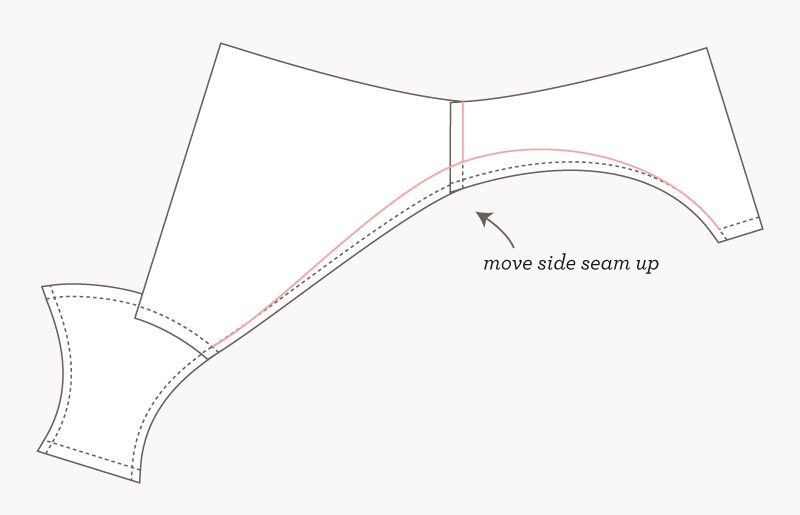
Add More Leg Coverage
This bikini is not “full butt coverage”. There are all sorts of bikini styles! This one shows a bit of cheek. How much or how little will also depend on where the widest part of your hips are located. If you want more coverage, here’s the way to do that:
1. Lower the side seam. I’d suggest no more than 1″ (2.5cm). 2. Draw a new smooth curve as illustrated:
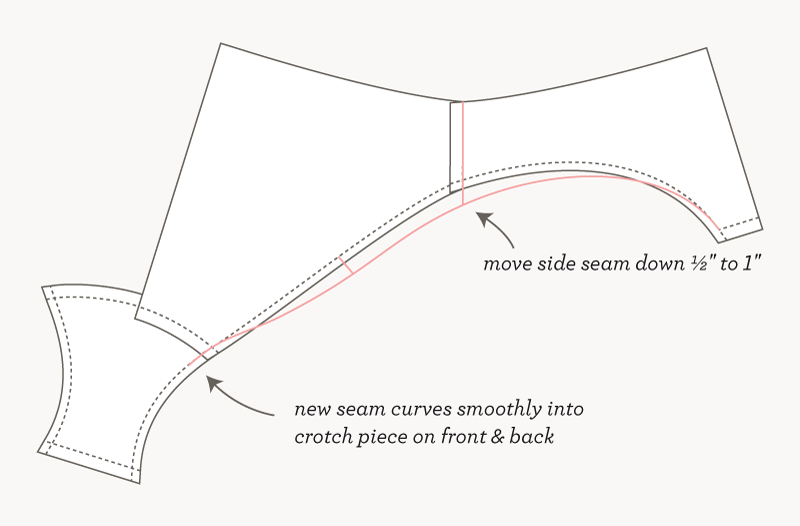
You want to make a subtle curve on the back piece. Don’t extend the “cheek” area more than you extended the side seam; otherwise you may create too much length in the back leg line.
For example, if you don’t draw the side seam down but only enlarge the back, you end up with more fabric across the back but a longer leg seam:
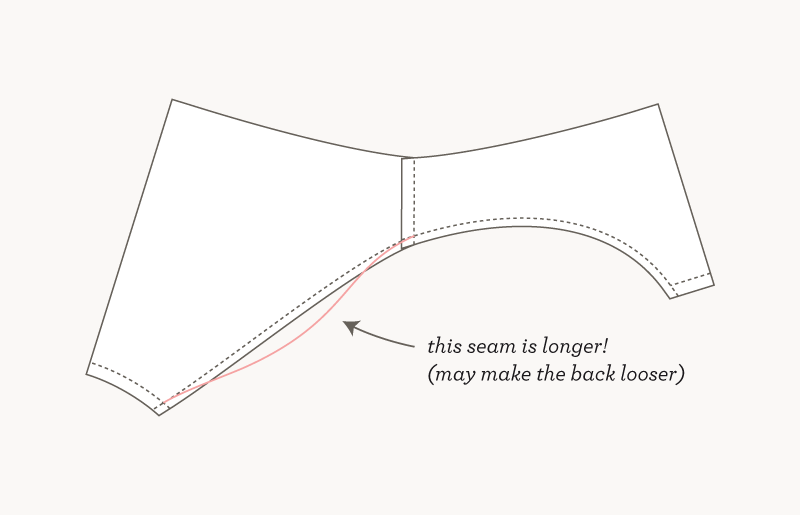
Because that new line is longer, it can have the opposite effect of what you wanted, and the leg might rise up even higher. There’s an art to the leg line! Just something to think about.
Raise the Leg
This would be a good alteration if the front of the bikini is cutting into your thigh or you just want a slightly higher leg cut:
Moving Front or Back Seam
The location of the crotch seams can be anywhere you want them. If you don’t like where they are sitting, you can move either of them! This is an example of how you’d move the front seam:
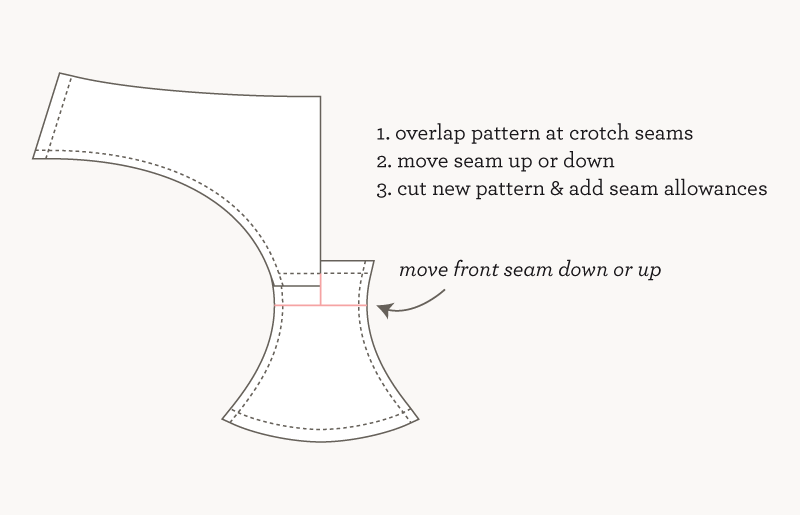
You can also completely eliminate one of the seams and cut the front or back as one with the crotch lining. I do this all the time when I want to make a really quick pair, and I’ll show you how when we cut the bikini. I’ll also be showing you how to sew the crotch lining in a way that hides all seams.
And that’s it for today!
Would you like tips and inspiration in the craft of lingerie sewing? Sign up for my weekly eletter The Lingerie Maker.
What alterations would be made for a thong back?
Hi Janna, that would almost be drafting a new pattern and a different style. This post is just about minor alterations to bikini leg styles. Thongs need a lot less crotch length… if you want a thong-style I’d suggest a pattern that is specifically for them.
Note to self: don’t read about altering underpant patterns at work, as it’s embarrassing when another doctor comes in with a patient to borrow something.
I’m almost 100% sure I’ve made that mistake with lengthening the bum/leg seam, it makes so much sense why that would actually make it worse! Thanks for this post – I wasn’t going to try the undies pattern (because I prefer high rise with bum coverage) but I’ll give it a go with these alterations
That’s too funny. Someone’s always walking in on me looking at lingerie.
Love this, very clear and useful!